
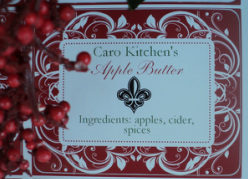
I adore apple butter. I have on many occasions eaten it from a spoon. After I got my tonsils removed, when I was six, bread with butter and apple butter was one of the only foods I would eat. It is a comfort food for me, and I have had it done well and done poorly. I searched high and low for a no-sugar-added apple butter recipe, often encountering what I considered to be overcomplicated processes. So, in the end, I made up my own and, happily, it worked! The only two issues are:
1) I did not take pictures, and
2) I did not save any for my family! I'll have to make a new batch soon.
Slow-cooked Apple Butter
Makes about 3 wide mouth pint jars (could be scaled back as necessary)
What You'll Need:
A 7-quart slow cooker Immersible hand blender or whisk
15 hours
8-9 pounds of apples
1 1/2 cups apple cider (or unfiltered, unsweetened apple juice)
2 Tbsp cinnamon
1 Tbsp ground cloves
1 Tbsp allspice
1 Tbsp nutmeg
What to Do:
DO NOT PEEL APPLES (doesn't that make you happy?).
Core and chop apples (I used an apple corer) -- no need to chop much-- and add them to the crock
Pour apple cider over apples
Sprinkle in the cinnamon, cloves, allspice and nutmeg
Cook on High for 1 hour Cook on Low for 13-14 hours.
At the end of 15 hours, your house will smell DELIGHTFUL. You may want to take the lid off and let the apples cool a bit. They will be dark brown and have turned to mostly mush. Blend with an immersible blender until smooth. If it is too liquidy, continue to cook it a while with the lid off. If you don't have an immersible blender, you could probably use a whisk, but the result would be chunkier than I like mine. I suppose you could also use a regular blender, just be careful not to burn yourself with spilling or steam.
THAT'S IT.
Packaging- This was also our first foray into canning (without any special equipment). We used wide mouth mason jars, an 8.5 qt dutch oven with a towel on the bottom, a boiling water bath, rubber tipped tongs, and a patient husband to can ours. Then we applied these cute personalized labels I got from StickerYou. If you can't or don't want to can, you can just seal it and keep it for a couple weeks in the fridge.
Survey Says- This is totally delicious.
1.b. In most cases, I gifted the apple butter with the granola (or with the other food items in a mega basket), but when I ran out of granola, I made... Whole Wheat Pound Cake
Packaging- I baked these in mini tins, removed them, wrapped them in plastic wrap and tied red ribbon around them.
Survey Says - It was moist and delicious and went very well with the apple butter.
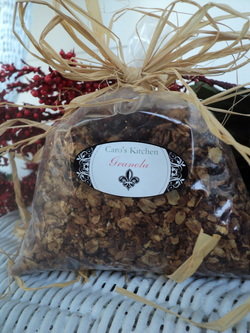
For the granola, I chose a recipe I found online, and tweaked it. My recipe looks like this:
What You'll Need:
3 1/2 cups old fashioned oats
1/2 cup coconut flakes
3 Tbsp sesame seeds (optional)
1/2 cup mixed nuts (I used a mixture of pistachios, slivered almonds, and cinnamon almonds)
2 tsp cinnamon
1 tsp sea salt
1/4 cup extra virgin olive oil
2 tablespoons honey
1 tablespoon maple syrup
2 tsp vanilla extract
1 cup dried fruit (I used cranberries, raisins and blueberries) You might like more fruit, and that's okay.
What to Do:
Preheat oven to 375. Line a cookie sheet with foil. Combine all ingredients except for fruit and spread evenly on the prepared cookie sheet. Bake for 20-30 minutes, stirring every 10 (this is really important-- I had a throwaway batch the time I forgot to stir!).
Packaging- I bought these bags from Sunburst and tied them with raffia bows then affixed a little personalized sticker from StickerYou. They were really cute. I gave these in conjunction with the apple butter.
Survey Says- Pretty good. I didn't love the addition of the sesame seeds (but you might) and I'm not crazy about super fruity granola, so I cut the dried fruit from 2 cups to 1. You should make yours however you want.
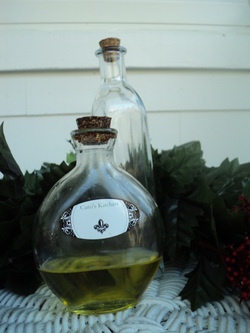
This one is really easy.
What You'll Need:
Extra virgin olive oil
Fresh rosemary, dried (I'll explain)
DRIED lemon peel
IMPORTANT TIP: I learned while researching infused oils that it is essential to ensure no water gets into your oil because, while bacteria will not grow in oil in and of itself, it WILL grow where there is water. So I dried my fresh rosemary for a day or so and didn't risk it with the lemon peel, opting for the dried variety.
What to Do:
Arrange rosemary in your container of choice. Sprinkle in the lemon peel to your liking . Carefully pour the oil over the rosemary, taking care to leave space at the top to close your container. Close your container and let sit for about two weeks before using.
Packaging- I bought these containers at Michaels. I was not in love with them, though, because their seal is a bit iffy. Would be better to have a latch of some sort. I wrapped a ribbon around the necks of the bottles (like a scarf) and secured them with small round labels. My preprinted labels didn't fit on the bottles, so I hand wrote the contents in permament marker. They were cute, but not as cute as the other gifts.
Survey Says: To be totally honest, I didn't get a chance to try these, but I imagine that they are pretty good.
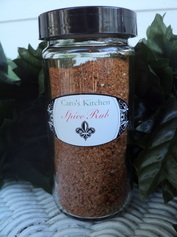
Thank you, Martha for this one!
Packaging - I bought these spice containers and rubber tops from Sunburst and labeled them with more cute stickers from StickerYou.
Survey Says: I gave these all away (in conjunction with the olive oil). I just made this one for posterity and am looking forward to trying it soon.
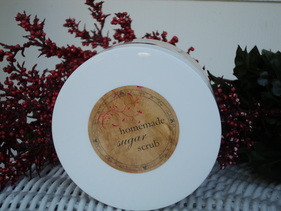
I also tried my hand at homemade cosmetics.
What You'll Need:
1 1/2 cups sugar (I used turbinado sugar, but any kind will work, depending on how coarse you want the scrub)
1/4 cup oil ( I used olive oil, but you can use sweet almond or any other carrier oil)
Essential oils, for scent (I used some kind of orange/pomegranate blend)
What to Do:
Combine all ingredients.
TIP - splurge on an essential oil you really love. Mine was just okay and that, combined with using olive oil, which has its own aroma, made for "eh" scented scrub
Packaging- I ordered plastic tubs from Sunburst, but a variety of containers would work fine. But I'd stay away from glass. I used customized labels for these, that worked well.
Survey Says- This works beautifully (I actually saved some for myself). I like the coarser scrub, because it exfoliates longer before melting away and leaving the super moisturizing olive oil behind. The scent wasn't my favorite and, when I brought it as a gift for a white elepant exchange, my aunt sniffed it and called it "weird."
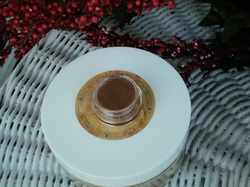
This sounds harder than it is, but admittedly will require a trip to a special health food store or purchase online to get a couple of the ingredients. This is adapted from a recipe by Crunchy Betty
What You'll Need:
4 Tbsp olive oil
1 Tbsp beeswax pearls
1 Tbsp honey
3 Vitamin E capsules, squeezed
7 drops Peppermint essential oil
1 tsp cocoa powder
What to Do:
Warm the oils, beeswax and honey in a small, stainless steel bowl over a pot of hot water. Be sure to warm it on VERY low heat. Stir until the beeswax is completely melted. Remove from heat and quickly whisk in the essential oil, vitamin E, cocoa powder, and colored lipstick. Place the bottom of the bowl into a shallow pan of ice water and continue whisking quickly as you add the honey. Once the honey is incorporated, quickly transfer the balm into your lip balm container (tube or tin) and allow to set for 3 hours.
TIPS: DO NOT TOUCH for three hours The bowl you use will be very challenging to clean. I have not figured a way around this, just letting you know.
Packaging- I used these lip balm containers from Sunburst, which work fine, but I would have preferred larger, shallower containers. I couldn't make small enough labels on StickerYou, so I had to cut them to make them fit. They looked okay, but not great.
Survey Says - This smells great and works really well, and people seem to be impressed that you can make your own lip balm. Still, I wish they were a prettier color. I used some Burt's Bees lip balm for color, and mine turned out way too brown (though it goes on pretty clear). Next time I might also cut back a bit on the cocoa powder. I gave these out with the bath scrub and a scented candle (not homemade; I am only one woman).

Regardless, Happy New Year!
 RSS Feed


